|
Inventory Setting Up the Inventory Program for E-Commerce |
|
Inventory Setting Up the Inventory Program for E-Commerce |
Assuming that LPP has already setup the Inventory Program & Items, the first step is to go back to Inventory & Sales Program Setup on the IFM menu to setup the catalog-level information. Current users of EZZ will notice that this area has been substantially enhanced.
Select the program you will be putting on-line. Once the Options box appears, select "F6 – E-Commerce Info" from the Options box. The "E-Commerce Information" options box will appear.
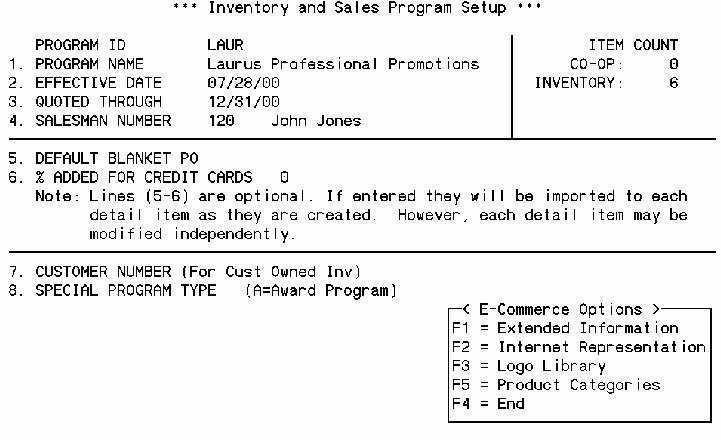
F1 = Extended Information
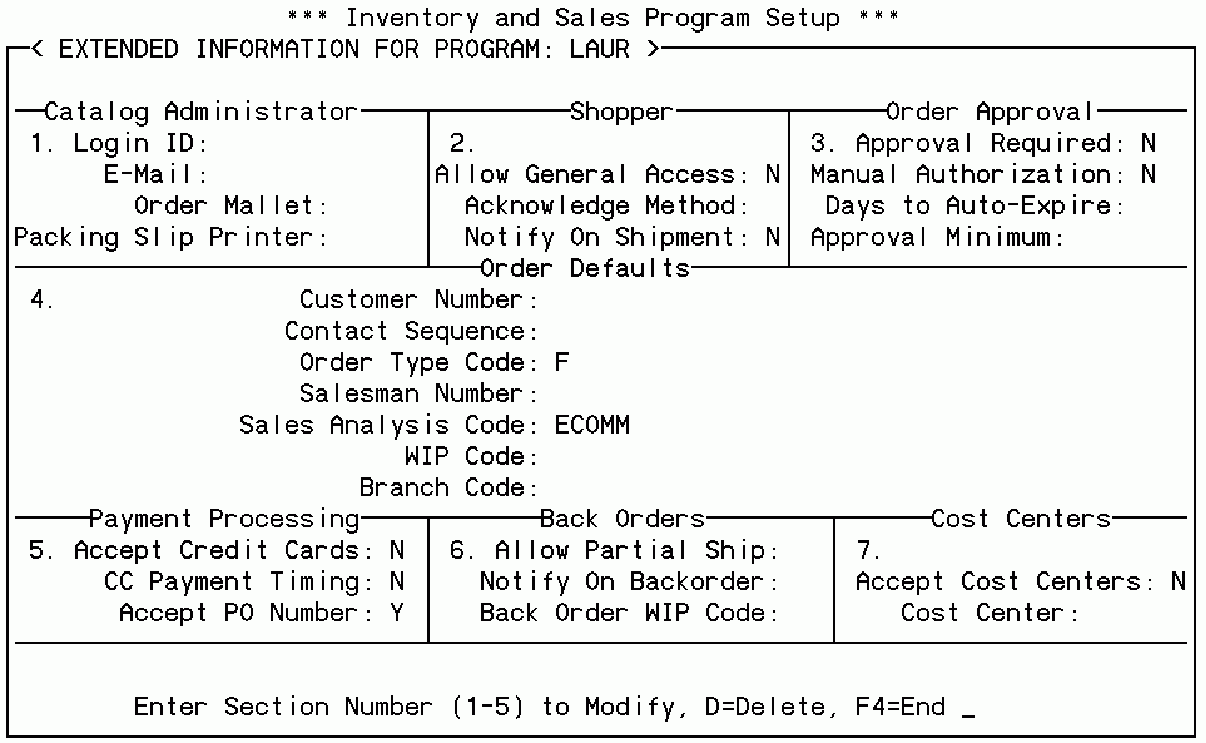
When F1 is pressed, a window displays titled E-Commerce Info for Program: XXXX. This area allows you to define options for your E-Commerce catalog, such as how payments are processed, and how orders are approved, etc.
Admin / Access
Administrator LoginID is used to identify the person internally who should receive messages associated with the catalog. Ie. If a shopper has requested a call-back or a catalog, etc.
General Access is used to limit access to the site. In a "General Access" (Consumer) catalog, anyone can shop the catalog, and register on-the-fly during the Shopping Cart Checkout. A Limited Access
Order Defaults
Default Customer No designates the Customer # to use when creating new Shoppers. Other Customer #'s may be assigned to a specific account on an individual basis using "E-Commerce Catalog / Site Access Control" on the IFM menu.
Default Contact Sequence – If used, this optional field allows new orders coming from the Web Catalog to be associated with a specific Contact in a Customer Account.
Default Order Type Code identifies the default Order Type for a catalog. Orders created are generally either Fulfillment and Co Op, but it is common to define a specific Order Type for a Catalog for tracking purposes.
Default Salesman No identifies the Salesman code to be credited with web-originated orders. If left blank, the default Salesman code for the Customer is used.
Default Sales Analysis (S/A) Code – If used, this S/A code will be placed on each web-originated order. S/A Codes are used to group orders for reporting purposes such as ROI calculation.
Initial WIP Code – This field contains the initial WIP (Work-In-Process) code to place on web-originated orders. Ex. Assigning a WIP code of "C" could automatically place web-orders on credit hold.
Default Branch Code – If used, this Branch Code will be placed on new web-orders. If left blank, the company's Default Branch Code is used.
Payment Processing
Accept Credit Cards – If this is set to Y then the E-Commerce sites will accept credit cards.
Credit Card Payment Timing – This can be set to either N for No Special Processing or S for Calculate and Capture During Shipment. If it is set to N for No Special Processing then it puts a credit card prepay on the order for the full amount of the order and this credit card prepay is processed the next time that Batch Credit Card Processing is run. If this is set to S for Calculate and Capture During Shipment then a zero dollar prepay is put on the order with the Credit Card Number and Expiration Date and this prepay does not get processed for zero dollars. Then when the order is shipped a second credit card prepay is created on the order which is only for the amount that was shipped. If subsequent shipments are made then additional prepays are created when the orders are shipped. This feature is used when you only want to charge their credit card when the orders are shipped.
Accept P.O. #s – If this is set to Y then the E-Commerce sites will accept PO #s.
Accept Cost Centers - are Y/N toggles for the various purchasing methods that can be used on your web site. Each of these toggles can be read by the HTML code to perform an appropriate action.
Cost Center Program ID is the name of the program which EZZ calls to validate cost centers, if they are used. This is an actual EZZ program/code ID such as "DPU500".
Order Approval Process
Approval Required – Is a Y/N toggle to determine whether or not a third-party is required to approve the order before it goes into production. If set to "Y", the order is placed on "Credit Hold" until an approval is received.
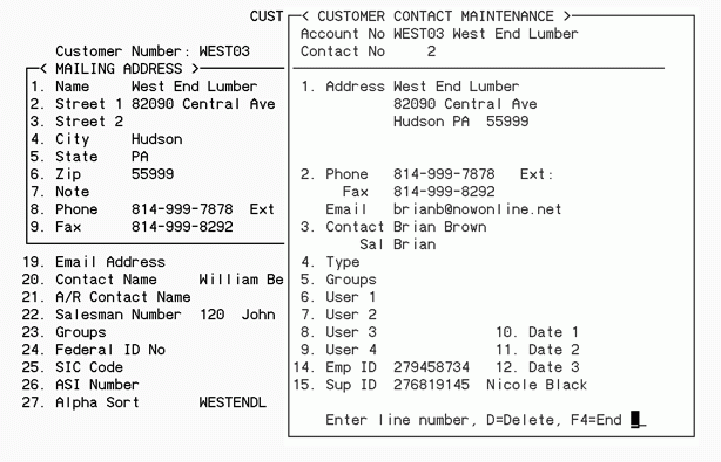
Manual Authorization – If set to "Y", the Shopper is permitted to manually key-in the E-Mail Address of the Approving Authority for his Dept or Cost Center. If set to "N", the Shopper's Supervisor (as defined in his Customer Contact setup) will be E-Mailed. This can be helpful if the Approving Authorities change frequently or are not kept updated in Customer Contact Maintenance.
# Days to Auto-Expire – If a third-party authorization process is required, this field designates how many Business days an unapproved order will remain in the system until it is deleted. If an order "times-out", the original Shopper is E-Mailed notifying him of the fact.
When the order is approved by the supervisor, then "Post Order WIP Status" (OPU menu, #6) should be used to change the status of the order and put in into production.
Miscellaneous
Notify on Shipment – If set to "Y", the Shopper is E-Mailed when his product is shipped. The actual E-Mail is user-defined, and generally contains the Tracking # of the shipment for tracking purposes. (Automating the Tracking # posting function requires the optional StarShip ADE Shipping Station Interface. Please contact our Sales Dept. for details.)
F7 = Internet Representation
* Note: Proper use of this area requires some technical understanding of HTML and web-programming. See the SmartTag documentation for proper use of the "iRep" tag, which works in conjunction with this feature.
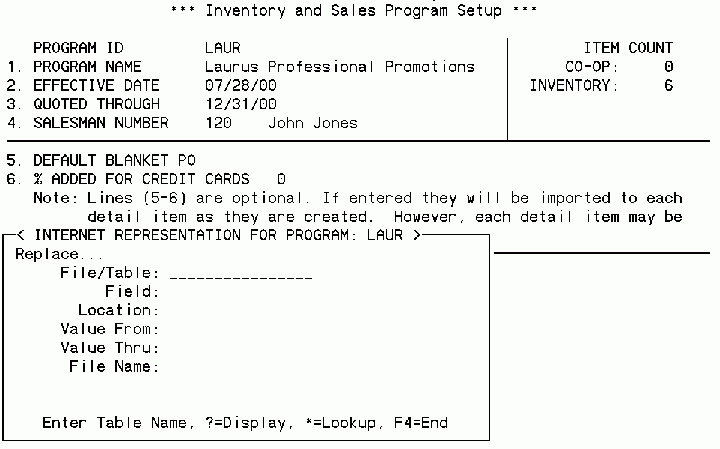
This area allows a web-programmer to associate HTML templates with a value or set of values in EZZ's database. Used by placing an "iRep" tag in an HTML template, this area allows you to automatically modify the elements (such as graphics) that appear on the web site when the rule or criteria is met. This allows for the replacement of graphics or other elements when a particular criteria is met. Ex. An Item that you have placed "On Sale" may be mapped to a graphic image that draws attention to the Item in Item listings.
Source
File/Table – This field identifies the data File or Table that data to be evaluated will be extracted from. Ie. "AR_CUST" for Customer information or "OP_ORD" for an Open Order.
Field – Identifies the Field within the source File or Table that data to be evaluated will be extracted from. Ie. "CUST_NO" used in conjunction with a File of "OP_ORD" would extract the Customer # from an Open Order.
Location – This is a user-defined field that needs to used only when a given File & Field combination needs to be represented in more than one way on the web-site. Refer to the SmartTag documentation for the "iRep" tag for further explanation.
Value Range Start / End – These fields define the starting and ending values respectively which qualify for replacement. Ie. If you wanted to draw attention to your "Quick-Ship" items, you might design an HTML template which used an "iRep" tag to place an image of a speeding delivery truck next to Items with a Lead Time less than 5 days.
F8 = Logo Library
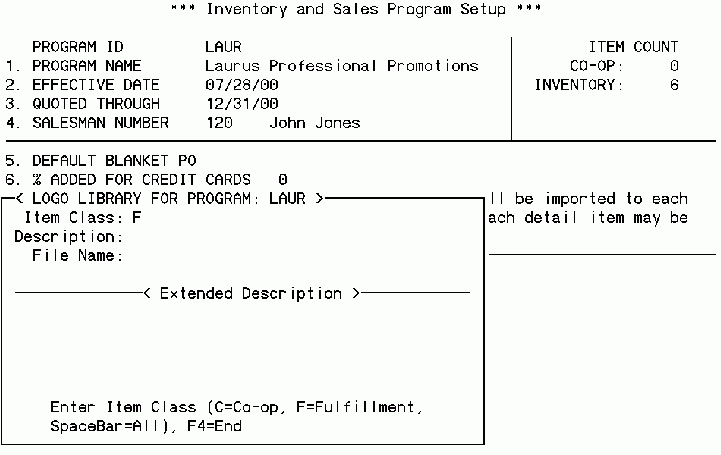
This option is used to define a library of logos which can be displayed in a table on the finished web site.
Item Class is a field which enables a separate logo library for Co-Ops and Fulfillment.
Description is a field which is used to enter a brief explanation about the logo.
File Name is a field which is used to enter the relative path of the logo. All logos are placed in the Elements sub-directory of the main catalog directory.
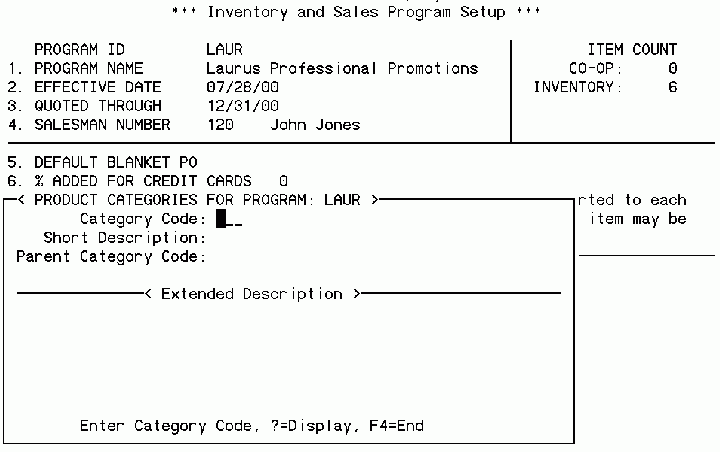
F9 = Product Categories
This option is used to define the various categories that your items belong to. These categories are then assigned to the items in Inventory Item Maintenance (IFM #3). The product categories are used to build the buttons/links that lead to the separate web pages for each product category. There can be many product categories or only one that encompasses the entire catalog. Changes to an existing product category can be made by hitting C to Change. Product Categories can be deleted by hitting D to Delete.
Category Code is a three character field used to represent the category code.
Short Description is a field which enables you to enter a brief definition about the Product Category.
Parent Category is a field which enables category codes to be assigned as sub-categories of other category codes. This enables the web page to have sub product pages of other product pages.
