|
Inventory Setting Up Inventory Items for E-Commerce |
|
Inventory Setting Up Inventory Items for E-Commerce |
Setting Up the Inventory Items
The E-Commerce system also requires that you configure the E-Commerce related prompts in Inventory Item Maintenance (IFM #3). This workbook is assuming that the reader understands how to set up inventory items and is designed to explain only the new E-Commerce Prompts.

Select F1 – Extended Information to display the E-Commerce Info window.
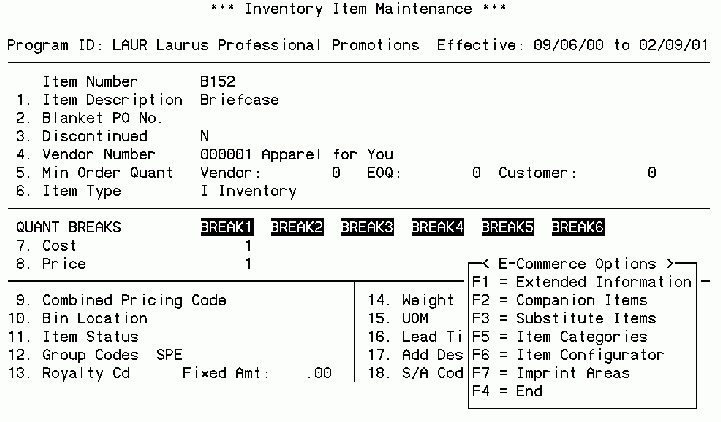
F1 – E-Commerce Info
This section is used to set various sockets or prompts that the HTML tags on the web page can read to change text or elements.
Publish to Web is a Y/N toggle which allows you to set an item to not publish to the web while you are maintaining the item's price, description, setup, etc. It is also used if there is a particular item that you simply don't want to have on the web site.
Top Seller is simply a Y/N toggle which the HTML tags on the web page can read to change text or graphics to indicate that this item is a top seller. This may result in a list of top selling items being displayed on a separate page.
On Sale is simply a Y/N toggle which the HTML tags on the web page can read to change text or graphics to indicate that this item is on sale.
Rush Available is simply a Y/N toggle which the HTML tags on the web page can read to change text or graphics to let the end user know that rush delivery is available.
Made in USA is simply a Y/N toggle which the HTML tags on the web page can read to change text or graphics to let the end user know that this item was made in the USA.
Union Made is simply a Y/N toggle which the HTML tags on the web page can read to change text or graphics to let the end user know that the item was union made.
Force Preset Qtys is a Y/N toggle which forces the end user to order quantities that are preset in a drop down box.
Use Custom Page is a Y/N toggle which determines if this item gets it's own special web page or is grouped and built into a table as normal with the other items.
Featured Item is simply a Y/N toggle which the HTML tags on the web page can read to change text or graphics to indicate that this is a features item. This may result in the item being displayed on a separate page of featured items.
Display Substitute Items if QOH is Less Than enables you to enter an on hand quantity that the system will read and display the substitute items if the quantity is less than the value you enter. The substitute items are set up in IFM #3 sF3 - Substitute Items.
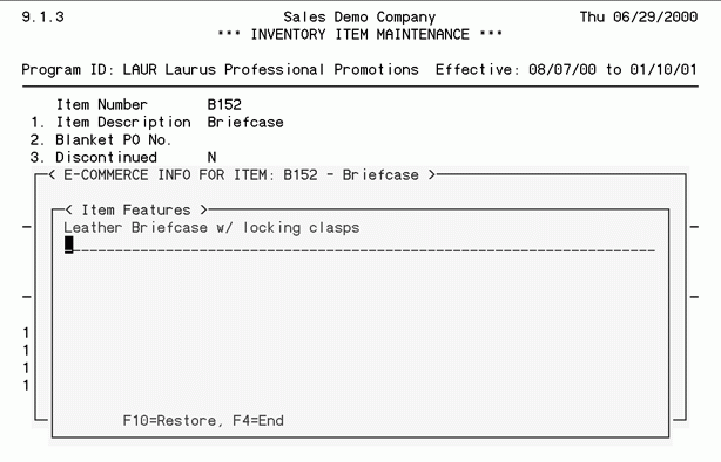
I = Item Features is used to enter any marketing info that should be displayed about the item on the web page.
O = Ordering Notes is used to enter any ordering constrictions such as lead time, sizing price increases, second color imprints, etc.
F2 – Companion Items
This section enables the assigning of companion items. The system simply asks you to type in companion item numbers. Companion items can either be used as a link on the item itself that will bring up a web page listing companion items or it can be used to display the detail thumbnail list of companion items whenever the end user clicks on this item and gets the detail page for the item.

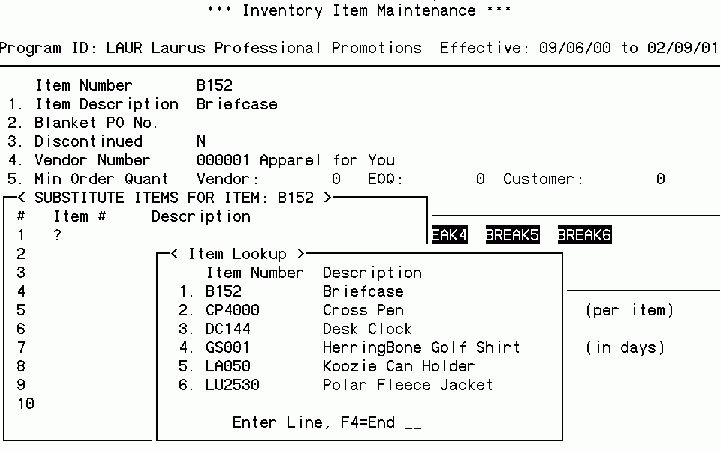
F3 – Substitute Items
This section enables the assigning of substitute items. The system requires that you type in the item numbers. Substitute items can be displayed either as a link on the item itself or they can be set to be displayed automatically when the on hand quantity drops below a certain level. The on hand quantity that the system uses to display substitute items is set in F1 – E-Commerce Info – Display Substitute Items if QOH is Less Than.
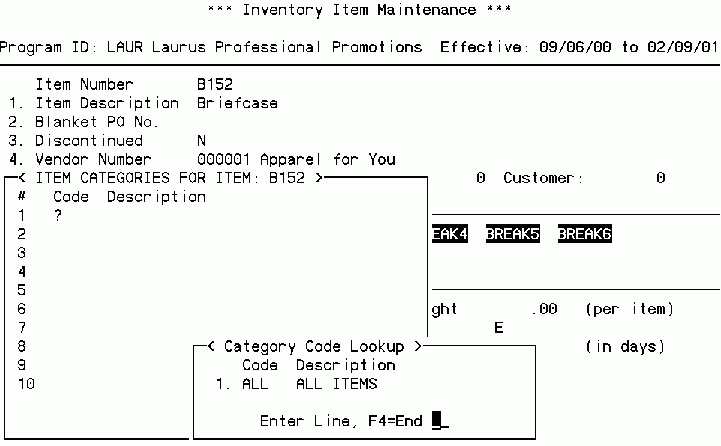
F5 – Item Categories
This sections enables the assigning of an item to the Product Categories that were set up in Inventory and Sales Program Setup earlier. By assigning an item to a product category, it places it on the web page for that product category. The placement and arrangement of the item is done through HTML templates and HTML tags.
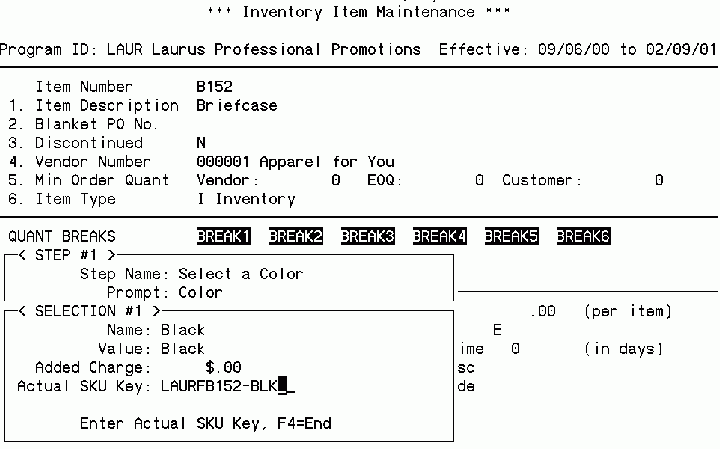
F6 – Item Configurator
This selection inserts prompts for your customers to enter color, size, texture, or any other option needed to complete the item. These may be processes including screen printing, logos, or embroidery.
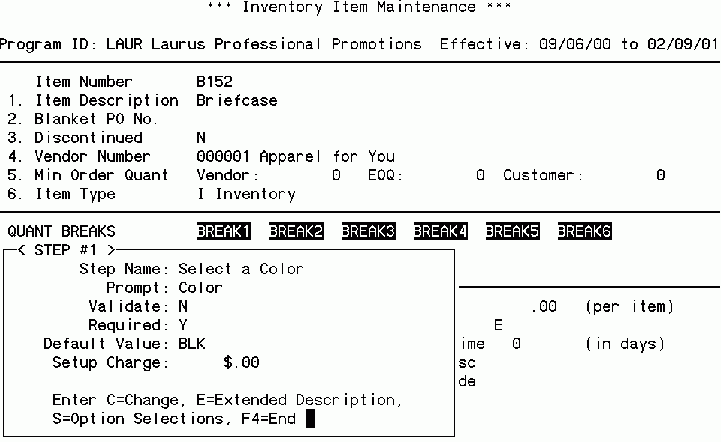
To enter the choices for the options selected above, enter "S". This will display the Selection window which will enable the choices to be entered. It allows the specific SKU number to be assigned to the item so that one item can be displayed on the web site, yet the correct SKU is chosen from inventory.
F7 – Imprint Area
Imprint Area enables you to define where on the item imprints, logos, etc are to be positioned. The Imprint Area allows for the assignment of the location, process, color, copy, and artwork information. More than one imprint area may be assigned to one item.

M = Mockup Info is used to define mockup information for an imprint area including the mockup filename, background color (in decimal RGB value), transparent imprint, position, size, and transformation.

Note: This completes the back-end explanation of how the E-Commerce prompts work in the EZZ System. The rest of this workbook deals with the web side integration of the catalog including the set-up, design, and maintenance of the web page and the web server. Quikey can handle these steps or they can be handled by someone else. If someone other than QCS is handling these steps for you, then any questions concerning web site design, image preparation, or web server integration is considered billable time.